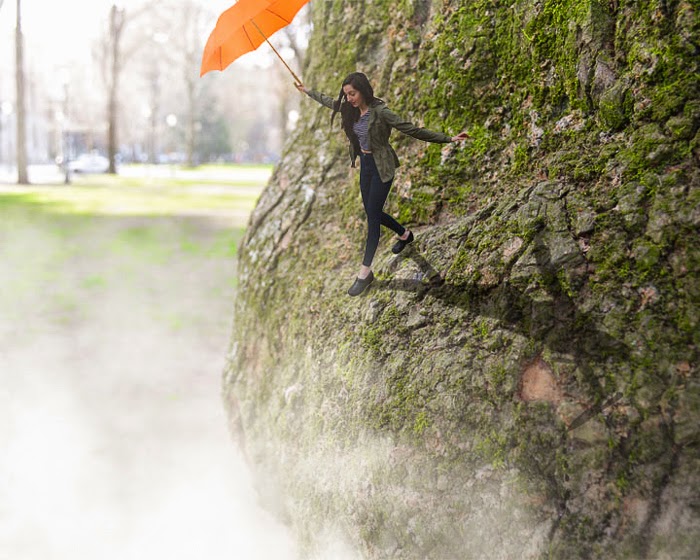
My inspiration for this photo was the large bulge in this tree I found in the park. I had Katherine jump off a park bench in order to get the proper pose. While in Photoshop I added the fog she was jumping into and the sunlight coming from the upper left corner, as well as the umbrella to go along with the contrasting weather so often seen in the Pacific Northwest. I also gave her a shadow holding a knife to give it a peculiar and slightly unsettling element. In Lightroom I did some final edits such as adding more warmth and making the orange umbrella pop more.
Saturday, March 21, 2015
Monday, March 9, 2015
Project 7:Alternative Processes
Daguerreotype
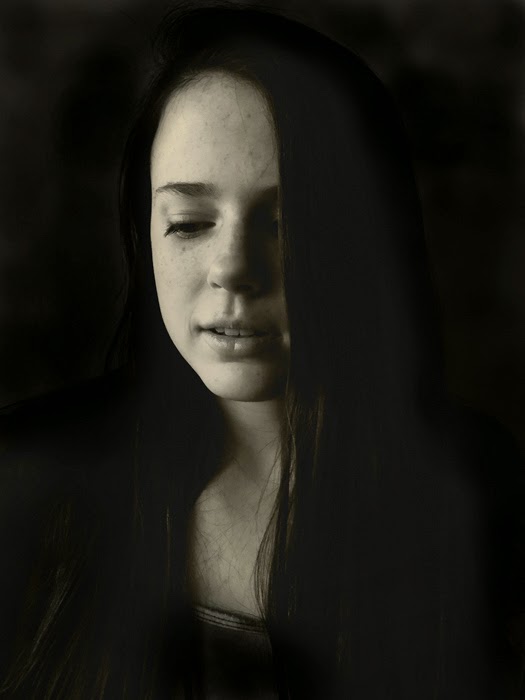
Real daguerreotypes are done on small sheets of metal and range from nearly black and white to a dusty rust color. To simulate the look of the metal, I layered multiple textures on top of the photo in Photoshop. This gave the the photo a worn and aged look that were also aided by the tint and vignette.
Gum Bichromate
This gum bichromate was done using blue, pink, purple, yellow, and green. The brushes I used had a more splattered look that I combined with a watercolor paper background.
Gum Bichromate

For this gum bichromate I used blue, yellow, and pink layers to maintain some of the original coloring of the orchid while still giving it an abstract look.
Daguerreotype with Frame
This daguerreotype is of a simple landscape in neutral colors. To make the image more interesting I added a frame I found on a real daguerreotype.
Gum Bichromate
I chose this azalea to be the subject of my cyanotype because of the color contrast on the petals. To help emphasize this I brought the image back into Lightroom once done with the Photoshop editing portion and made the darks deeper and whites lighter.
Wet Plate Collodian
To make this image look like a wet plate collodian I made sure to have very dark shadows and noticeable highlights. Another aspect I tried to incorporate was the look of a singular direct source of lighting.
Friday, February 20, 2015
Project 6: Multiple Image Techniques
Multiple Exposure
This multiple exposure photograph is of the orchid I got my mother for her birthday. When taking the images I spun the orchid around in stages for 360 degrees to get all angles of the flower. When each shot was overlaid in Photoshop the orchid gained a more textured appearance as well a plentiful quality. I then fine tuned the contrast and exposure in Lightroom to help define the individual petals.
HDR
This HDR was done in Photoshop using a photograph taken of the Hawthorne Bridge from the west bank of the river. I chose this subject for an HDR image because of its old industrial vibe which would be enhanced by this style. The use of the HDR technique helps add definition and color to the cloudy sky as well as a sense of movement to the water below the bridge.
Panorama
This panorama was taken standing on a dock facing the west shore. I chose this panorama because of the visible transition from a residential area to the very heart of downtown. The residential neighborhood has a rather monotone appearance in comparison to the brightly colored city. In Lightroom I edited the river to have more contrast between the shadows and highlights while simultaneously giving it a highly reflective surface.
Multiple Exposure
The photos used to make this multiple exposure image were taken on the same dock as was the panorama, yet now facing the Hawthorne Bridge. The photos that were layered were of Katherine while she moved around taking photos of her own. I edited this photo to be less saturated to go along with the gloomy city back drop.
Tuesday, January 27, 2015
Tuesday, January 13, 2015
Subscribe to:
Posts (Atom)